Sequence for Strengthening the Lungs and Boosting Respiratory Health – Dr. Yang’s Feature in Yoga Journal

Article originally published via Yoga Journal – view here.

These pranayama and asana practices, designed by Yang, can help ease the lingering pulmonary, cardiac, and neurological symptoms of COVID-19. They are also beneficial for anyone working through illness, stress, and difficulty breathing. Find a quiet, comfortable space and relax into breath and movement.

Diaphragmatic Breathing

After illness, your breathing may be altered. You might experience reduced diaphragmatic movement and compensate by using more of your neck and shoulder muscles. This results in exacerbated shallow breathing, increased fatigue, and higher energy expenditure. The breathwork described below aims to increase the efficiency of your respiratory muscles (including the diaphragm), helping you to boost energy and find comfort in your breath.

When working with a COVID recoveree, teach or practice diaphragmatic breathing a bit differently than traditional technique. You’ll add a breath hold at the end of your inhalation to improve oxygen exchange in the alveoli (the tiny air sacs at the end of your respiratory tract that enable oxygen and CO2 exchange) and exhale through pursed lips, in order to create more resistance and strength. Adding active abdominal muscle contractions at the end of your exhalations will increase abdominal pressure and push your diaphragm up to improve elasticity and strength.

  1. Sit with your back against a wall. Let the back of your head also gently touch the wall.
  2. Place your right hand on your belly and left hand on your chest.
  3. Breathe in slowly through your nose at a measured pace, so that the flow of air is even throughout the entire length of your breath.
  4. As you inhale, feel the right hand move as your belly expands with the inhale. The hand on your chest should remain as still as possible.
  5. Hold in the breath at the top of your inhalation for 2-5 seconds.
  6. Exhale slowly out through pursed lips, contracting your abdominal muscles up and in while releasing the air with the same cadence as your inhalation.
  7. Repeat this cycle of inhaling through the nose, holding, and exhaling through pursed lips for 5-10 breath cycles, or more if you can tolerate it. As you practice this technique, feel your entire thorax expanding in all directions, including into the wall, as that will give you sensory feedback on your skin that you are really taking in a deep breath.
  8. As you progress, you can also coordinate the breath with lifting the arms during your inhalations, and relaxing your arms down with the exhalations.

Yoga Postures

Salabhasana (Locust Pose)

Salabhasana reproduces the “proning position” that we recommend for COVID patients. Proning helps to recruit collapsed or poorly utilized alveoli that may not otherwise facilitate adequate oxygen exchange due to poor positioning and gravity. This technique works especially well for those who have been bed-ridden for several days or weeks.

Start prone with your forehead on the mat and your arms alongside your body. On an Inhalation, life your arms, shoulders, chest, and head. On an exhalation release your upper body down. Cycle through this 5-8 times. To rest, stack your hands under your forehead.

Bonus: add the legs to strengthen the lower body!

Anantasana (Vishnu’s Couch)

Anantasana is helpful for COVID long-haulers for the same reasons that Salabhasana is, but from a different orientation When practicing Anantasana for post-COVID recovery, the goal is not to get your top leg up high, but to balance on your side while taking in a deep breath. Feel free to step your top foot in front of the bottom knee to maintain balance. Take several breaths here.

Marjaryasana and Bitilasana (Cat and Cow Poses)

Cat and Cow Poses are particularly helpful for COVID long-haulers because they reprogram the kinesthetic connection between breath and movement. They also stretch many of the back and chest muscles that may have become tight while being sedentary. Cat and Cow also stretch your intercostal muscles (important accessory muscles for breathing) and tone your core muscles (also important to improve diaphragmatic control).

Start with Cow so you stretch the front of your chest and reverse the kyphotic thoracic curve that may have become more exaggerated while laying in bed or sitting for prolonged periods of time. Cycle through the movements with your breath. If you prefer to practice in a chair, hold onto your knees with your hands and move your spine with the breath. Cycle through 5-8 times.

Dandasana (Staff Pose)

This posture teaches us to sit and stand up straight and use our core muscles. Posture plays an important role in respiratory function, and studies on COVID-19 recovery encourage patients to try to sit up tall.

Sit on a bolster or block and roll a blanket under your knees to take pressure off your low back. Place your hands on the mat or on low blocks next to your hips to assist in finding an upright posture. Focus on gently dorsiflexing the feet (especially the big toes) by pressing the heels out and away from you.

6 Yoga Poses For Knee and Hip Arthritis – Dr. Yang’s Feature in Yoga Journal

Original article was featured in Yoga Journal – view article here.

Arthritis is the most common condition affecting the musculoskeletal system, with the kneeand the hip being the two most commonly affected joints. Approximately 21 percent of adults in the United States live with arthritis, which is characterized by the slow and sometimes progressive loss of cartilage that covers the bones of a joint.

Many people assume medication or joint surgery are the only ways to curb arthritis pain, but increasing evidence shows that targeted exercise and strength training can actually delay or, in certain circumstances, even prevent the need for surgery.

Both the Centers for Disease Control and Prevention (CDC) and the Arthritis Foundation recommend exercise programs for hip and knee arthritis that include flexibility, strengthening, endurance, and balance. Yoga has all four components, making it a perfect tool for reducing arthritis pain and disability.

How Yoga Reduces Arthritis Pain

Practicing yoga strengthens the muscles around an effected joint, stabilizing it and reducing pain. People with hip and knee pain should focus on strengthening a few critical muscle groups: the knee flexors (hamstrings), knee extensors (quadriceps), hip extensors (glutes), and hip abductors (outer thighs).

Another reason strengthening these muscles is important: Say you have arthritis in your knee. The pain will likely cause you to put less weight on the joint and use it less. Over time, that lack of causes weakness in the surrounding muscles, which causes more pain. What’s more, when you use these muscles less, their range of motion is decreased…which causes more pain, which feeds right back into the cycle.

The solution: Adding these six poses—which strengthen the muscles around the hip and knee—to your practice.

Side Plank on Forearm (Vasisthasana)

Hip abductor weakness is common in hip and knee arthritis. When the hip abductors are weak, you might shift your weight over the hip where you feel pain when you walk. That causes the pelvis to tilt downward instead of upward, which increases compressive forces on the inner knee joint. Side Plank is one of the best exercises to strengthen the gluteus medius muscle, which is the primary hip abductor.

side plank on forearm
Photo: Colin Gazley/Human Kinetics

Come into a Forearm Plank.  Rotate the right forearm so the fingers of the right hand point toward the left hand and your right forearm is at a 45-degree angle to the front edge of the mat. Roll to the outer edge of your right foot, stacking your left foot over the right. Press the hips up and away from the mat, engaging the core and right inner thigh up into the left leg. Lift the left fingertips to the sky and press the right forearm down into the mat as you stack the shoulders. Gaze forward or up to the left hand. Hold for 3 to 5 breath cycles. Repeat on the other side. If this pose is too hard on your shoulders, lower the bottom knee to the mat for more support.

Warrior I (Virabhadrasana I)

In Warrior I, the quadriceps muscles are strengthened by maintaining knee stability as the hip, knee, and ankle of the front leg flex. Warrior I also strengthens the hip extensors of the back leg by controlling the degree of hip extension and abduction because of its role in centering the pelvis over the feet. Warrior I also offers variability because you can control the length of the stance (keep feet closer together for more stability). If this pose hurts your knee, shorten your stance and back off of the deep knee bend of the front leg.

warrior I
Photo: Colin Gazley/Human Kinetics

Starting in Downward-Facing Dog Pose, step the left foot forward between the hands so that it is placed next to the left thumb. Spin the right heel down approximately to a 45-degree angle and spin the outer edge of the right foot down so the entire plantar aspect of the foot grounds down. With your left leg bent and thigh parallel to the floor, inhale your arms up to the sky, hands facing each other, fingers pointing up. The back leg remains straight and strong as you anchor the foot to square the hips forward. Lift the lower abdomen up and in as you lengthen the tailbone down. Draw the shoulders down the back, and gaze forward or slightly up between your hands. Hold for 5 breath cycles. To exit, bring the hands down in a swan dive to frame the foot, and return to Downward-Facing Dog. Repeat on the right side.

Extended Side Angle Pose (Utthita Parsvakonasana)

Hamstring strengthening is an important principle in improving muscle strength and decreasing pain in people with hip arthritis. Extended Side Angle places the front hip into abduction and external rotation, allowing for increased activation of the hamstrings. This change in the center of gravity, when compared to Warrior I, minimizes the activation of the hip adductor muscles and offers more potential for strength gains in the posterior leg muscles. Isometrically pull the front knee toward the trunk to activate the hamstrings.

extended side angle pose
Photo: Colin Gazley/Human Kinetics

Start in Warrior II Pose, with the left foot forward. Place the left forearm onto the left thigh, or the left hand to the floor or on a block outside your foot. Extend the right arm over the right ear to feel the extension in your right side body. The palm faces down to the ground with the fingers extending out in front of you. Extend both sides of the waist to reach out and over the front thigh. Engage the abdomen to protect the spine and side. Your gaze can extend toward your right hand, to the ground, or straight forward, depending on which is most comfortable for your neck. Hold for 5 breath cycles. To exit the pose, turn the torso to the mat to frame the left foot with your hands, and step back to Downward-Facing Dog Posebefore switching sides.

Bridge Pose (Setu Bandha Sarvangasana)

Bridge is an excellent way to strengthen the hip extensors in a moderate weight-bearing position without overextending the joint. Bridge also strengthens the knee flexors and core and stretches the hip flexor. Hip strength is important in individuals with knee arthritis, because it decreases the workload on the quadriceps and places less force on the knee.

bridge pose
Photo: Colin Gazley/Human Kinetics

Start by lying on your back with your knees bent, feet flat on the floor, and arms alongside your body with hands facing down. Roll your shoulders underneath you as you begin to lift your hips. Press your feet and shoulders into the mat as you lift your hips. As you rise, walk the feet closer to your buttocks and scoot your shoulders into midline to further elevate the hips and lengthen the tailbone. Keep your knees parallel as you engage the inner thighs. Interlace the fingers on the mat, extend the palms on the floor next to you or hold on to a strap with the hands. Keep your neck neutral by relaxing your chin away from your chest to preserve the natural curve of your cervical spine. Your shoulders, feet, and back of the head support your lift comfortably on the mat because you are using the muscles of your buttocks and back to lengthen your hips. Hold for 5 to 10 breath cycles. To exit the pose, release the hands if interlaced and slowly roll down your spine.

Gate Pose (Parighasana)

Gate activates the hip adductors in the kneeling leg, which keeps the hip in an internally rotated position. To engage the hip adductors, isometrically contract the kneeling leg toward the midline. This pose also strengthens of the hip abductors of the kneeling leg and the knee extensors of the extended leg.

gate pose
Photo: Colin Gazley/Human Kinetics

Start in a standing kneel (on your knees and shins, but hips lifted). You can place a folded blanket under the knees for cushioning and comfort. Step your right leg out to the side to straighten the knee, with the right toes pointed forward. Make sure your hips are aligned over the knees. Inhale the arms up to the sky and relax your right hand to draw down your right leg toward the ankle, stretching through the left side of the trunk. Continue pressing the hips forward, so as not to let the buttocks bow out. Feel the stretch on the right inner thigh as you ground through the right foot. Bend farther into the side bend, as much as is comfortable but at the same time challenging. Hold for 5 to 10 breath cycles. To exit the pose, reach both arms back up to the sky and step the right knee next to the left. Switch sides.

Tree Pose (Vrksasana)

Tree pose helps with knee extension mobility, knee extensor strengthening, hip abductor strengthening, and increased core stability. Tree requires significant muscle activation of the knee extensors and knee flexors to keep the knee of the standing leg in neutral extension. It also  activates the hip abductors to keep the pelvis level. The lifted leg strengthens the hip flexors and hip external rotators of the bent leg to maintain the same-side hip in line with the pelvis. With the knee flexors bending the knee, it also provides excellent hip opening because it stretches the internal rotators. Hip muscle weakness is quite common in people with hip arthritis, so modifications will likely need to be made initially. Be mindful in Tree: It can place compressive loads on the standing knee while the knee extensors in the straightened knee are strongly contracted.

tree pose
Photo: Colin Gazley/Human Kinetics

Start in Mountain Pose (Tadasana), with a firm footing on the ground and your gaze focused on an object in front of you. Shift all of your weight to your left leg and bend your right knee up into your chest, catching hold of the knee with your hands. Hold your right ankle with your right hand and fold the foot into your inner thigh. Press the left thigh back into your right foot so the foot does not overpower the standing leg or cause it to bow out. Reach your arms overhead or keep the hands to prayer at heart center. Lengthen through your tailbone and engage the abdomen as you draw the shoulder blades down the back and open the heart space. Hold for 5 to 10 breath cycles. To exit the pose, step your right foot down and shake it out. Repeat on the opposite side.

Adapted from Adaptive Yoga by Ingrid Yang and Kyle Fahey. Reprinted by permission of Human Kinetics. Copyright © 2021. Buy now

Ingrid Yang, MD, JD, E-RYT 500, C-IAYT, is a yoga therapist, teacher, and physician. She leads teacher trainings, workshops, and retreats all over the world, seeking to integrate her background in allopathic medicine with the ancient teachings of the centuries-old yoga traditions. Her teaching is seeded deeply in dharmic philosophies and an expert grasp of movement kinesiology.

Kyle Fahey, DPT, PT, is a doctor of physical therapy and senior physical therapist at the Shirley Ryan AbilityLab in Chicago, Illinois, the world’s largest and top-ranked acute rehabilitation hospital. He is the founder and creator of a weekly wheelchair yoga program for the hospital and seamlessly integrates adaptive yoga into his treatments.

Read Dr. Yang’s Feature in The Healthy – I Tried a Back Posture Corrector—Here’s What Happened

This article was originally posted by The Healthy.

I used a back posture corrector for two weeks to improve my posture and alleviate my back pain while sitting. This is what it was like.

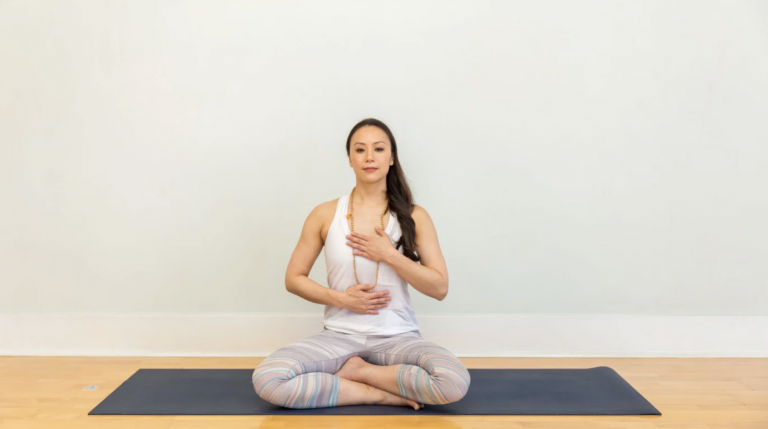
Sit straight, shoulders back

Growing up, my mom would tell me to stand tall, sit up straight, shoulders back, chest out, and face forward. After all, this is the key to maintaining good posture and looking confident. And this was before you could wear a discreet back posture corrector. Today, I still heed that advice, but working remotely full-time has led me to slouch more. (Sorry, mom.)

At the beginning of the Covid-19 lockdown, I would find myself hunched over with my back slightly rounded. When I noticed, I would correct myself. But, of course, shortly after I’d reassume the hunched position. As lockdown restrictions were extended, I started to do more sitting than standing (no commute wait times or crowded subways to add to my “stand” goal). Soon, the aggravating lower back pain started to kick in. (Here’s how to improve posture for back pain relief.)

If you use a computer for work, chances are you’re guilty of “sinking into” your work activity and starting to slouch like me.

A small study, published in 2013 in the Journal of Back and Musculoskeletal Rehabilitation, found musculoskeletal pain is common among laptop users. Shoulder pain was the most common (75.7 percent) and elbow pain the least common (37.3 percent). Those who reported the most musculoskeletal pain also used single-strap laptop bags.

The shift from being out and about on a day-to-day basis to leading a sedentary life (minus the at-home workouts and short 10-minute walks) took a toll on my back. Desperate for a quick fix, I decided to do what any millennial would do: I browsed Amazon for a good product. Enter the back posture corrector.

What is a back posture corrector?

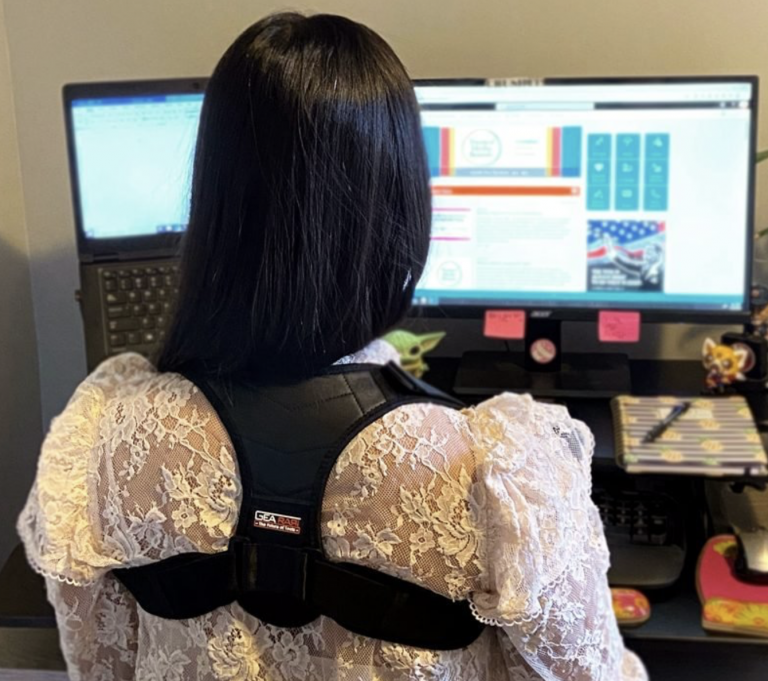
A back posture corrector is a wearable device that typically comes in the form of a cross-back brace with adjustable straps, a long line back brace, a lower back belt, or an electronic option with built-in sensors that aim to provide better spinal alignment.

“It can help alleviate muscle tension by reducing pressure on the spine, thereby reducing the amount of strength needed in the muscles to support the spinal column,” says Ingrid Yang, MD, an internal medicine physician in San Diego.

“Back posture correctors sometimes use straps in order to create a force to pull you into what the [manufacturer] perceives as the ‘correct’ posture,” says David Perrotto, a physical therapist at Prehab Network in New York City. They act as constant feedback for how it feels to be in a proper posture position. However, Perrotto cautions, the alignment that the posture correctors bring you into may or may not agree with your body.

He urges you to seek a physical evaluation from a physical therapist first before you buy.

Choosing a back posture corrector

Due to overwhelming curiosity and an Amazon Prime Day deal, I decided to act with haste and get a back posture corrector without consulting a medical professional. (Don’t try this at home.) I opted for a Gearari posture corrector on Amazon that has more than 21,000 reviews and is Amazon’s “#1 Best Seller.”

The major selling point: It was on sale for $7.20 (original price $21.99). Not only was it a good deal, I saw it as  an important investment for my health.

Before I started, I read there’s an adjustment period called the “14 Days of Evolution,” according to the manufacturer, during which your posture is expected to improve. For two weeks, you’re supposed to wear it for two hours every day—you can’t wear it for too long in the beginning.

Perrotto agrees you should introduce the back posture corrector gradually. This is so you don’t “introduce too much of a different stimulus to your body, as it can lead to extreme soreness or pain,” he says.

In other words: Your body needs to adjust to it.

His recommendation is to start 30 minutes three times a day on an eight-hour workday. “As long as you do not experience any adverse effects, gradually start to increase the time it’s being used,” Perrotto suggests.

After my back posture corrector arrived, I tried it out for the recommended two weeks. This is what happened.

What it’s like to use a back posture corrector

Week one

The first day using my posture corrector, I was eager and ready to improve my spinal alignment. This back posture corrector was confusing to put on at first. I had to adjust the straps for a few minutes to get it to a setting that was comfortable for me. It almost seemed as if it was my first day of school with a JanSport backpack. The adjustable straps on the back brace are designed so that if you slouch, you’ll feel some tension on your shoulders because the straps tighten.

Ready to start my workday, I made sure my feet were flat on the floor, my chair and computer screen height adjusted, and my hands and arms positioned correctly on the armchair and keyboard.

I was mindful of my posture and ready to reap some benefits. Instead of using it for two hours consecutively, I divided it up into four 30-minute intervals over an eight-hour workday to gradually get my body accustomed to it. (Here are some desk ergonomics to learn.)

After a full workday and taking it off after use, I did notice my concentration and my posture seemed better while wearing the corrector. I was, however, relieved whenever I took it off because it felt like I was wearing a backpack. I felt the straps underneath my armpits.

During the week, I wore the back posture corrector every day and felt different when I wore it versus when I didn’t. I felt I could breathe better. The rest of my body also felt “linear” and alert.

Week two

One week later and I felt the same. I felt great when I wore the posture corrector because I was mindful of my sitting position during the day. I was able to focus more, breathe better, and I also felt my digestion improved after I came back from eating lunch or having a snack. (Here’s what you need to know about sitting disease.)

A plus: My neck and lower back didn’t hurt as much as before. This is likely due to not putting much strain on those muscles. I was relieved for the relief.

However, once I took it off, I slowly started to morph into my standard and “comfortable” slouch position. I would start to notice after working on a story and immediately sit up straight again. But, without the posture corrector, I eventually slumped back down. (Here’s how bad posture can affect your health.)

The truth is the back posture corrector alone is not enough. It’s a temporary solution to a bigger issue. Disappointed, but not surprised, I realized the back posture corrector only works when I wear it. Science agrees.

What the science says

In a small study of 38 healthy overhead athletes (for instance, baseball, volleyball, and tennis players) prone to poor posture, researchers found the use of a compressed shirt and shoulder brace during upper body exercises led to an improvement in shoulder posture and muscle activity. The study was published in the Journal of Athletic Training.

It seems a posture corrector brace does provide the benefit of self-awareness when you wear one, making you more likely to maintain good posture.

The type of back posture corrector experts recommend

When it comes to using back posture correctors, experts vary on what they do and do not recommend.

Preston Brown, a Milwaukee-based board-certified clinical specialist in geriatric physical therapy and owner of Prestige Therapy and Wellness, says you should consider body height and body weight when shopping for a posture corrector. “This is to ensure proper fit and support.”

He adds that it’s important to look for comfort because some posture correctors are a challenge to put on and take off, not to mention uncomfortable to wear. A healthy price range to look for is between $10 to $50, according to Brown. (These are the best posture correctors back experts recommend.)

Meanwhile, Perrotto does not advise the use of these devices. “I don’t use back posture correctors,” he says. “In my clinic, I train people to teach their body to find the position on their own. People need to work on their body and not rely on an outside source. Only if they are forced to sit down for a while will I use something to give them feedback on when they fall into poor posture.”

Dr. Yang agrees, saying she doesn’t believe in back brace use except in an acute situation under the instruction of a doctor. And even then, she says, “I do not recommend the use of back braces for longer than a few days. They are only meant to be helpful in reminding us to maintain good posture.”

If you experience increased pain or discomfort, skin irritation/breakdown, onset of numbness or tingling, or no improvement in posture, Brown advises to stop using immediately.

Ways to improve your posture

If you do not want to opt for a back posture corrector, there’s good news: You can work on improving your posture naturally.

Strength and conditioning exercises

“Conditioning yourself and gradually strengthening the areas that are weak, imbalanced, or overworked with spine-strengthening exercises, is the better way to go,” says Dr. Yang. She suggests doing these exercises when you take your regular breaks throughout the day to stretch and strengthen. “This will help counteract the effects of sitting at a computer for hours at a time,” she says.

Brown also agrees that stretching your lower and upper back along with gentle stretches will promote good posture and help decrease stress or strain on the entire spine. “Make sure that the exercises you want to do are correct for you and that you are doing them correctly by consulting a physical therapist.” (This is the best time to work out.)

Resistance training

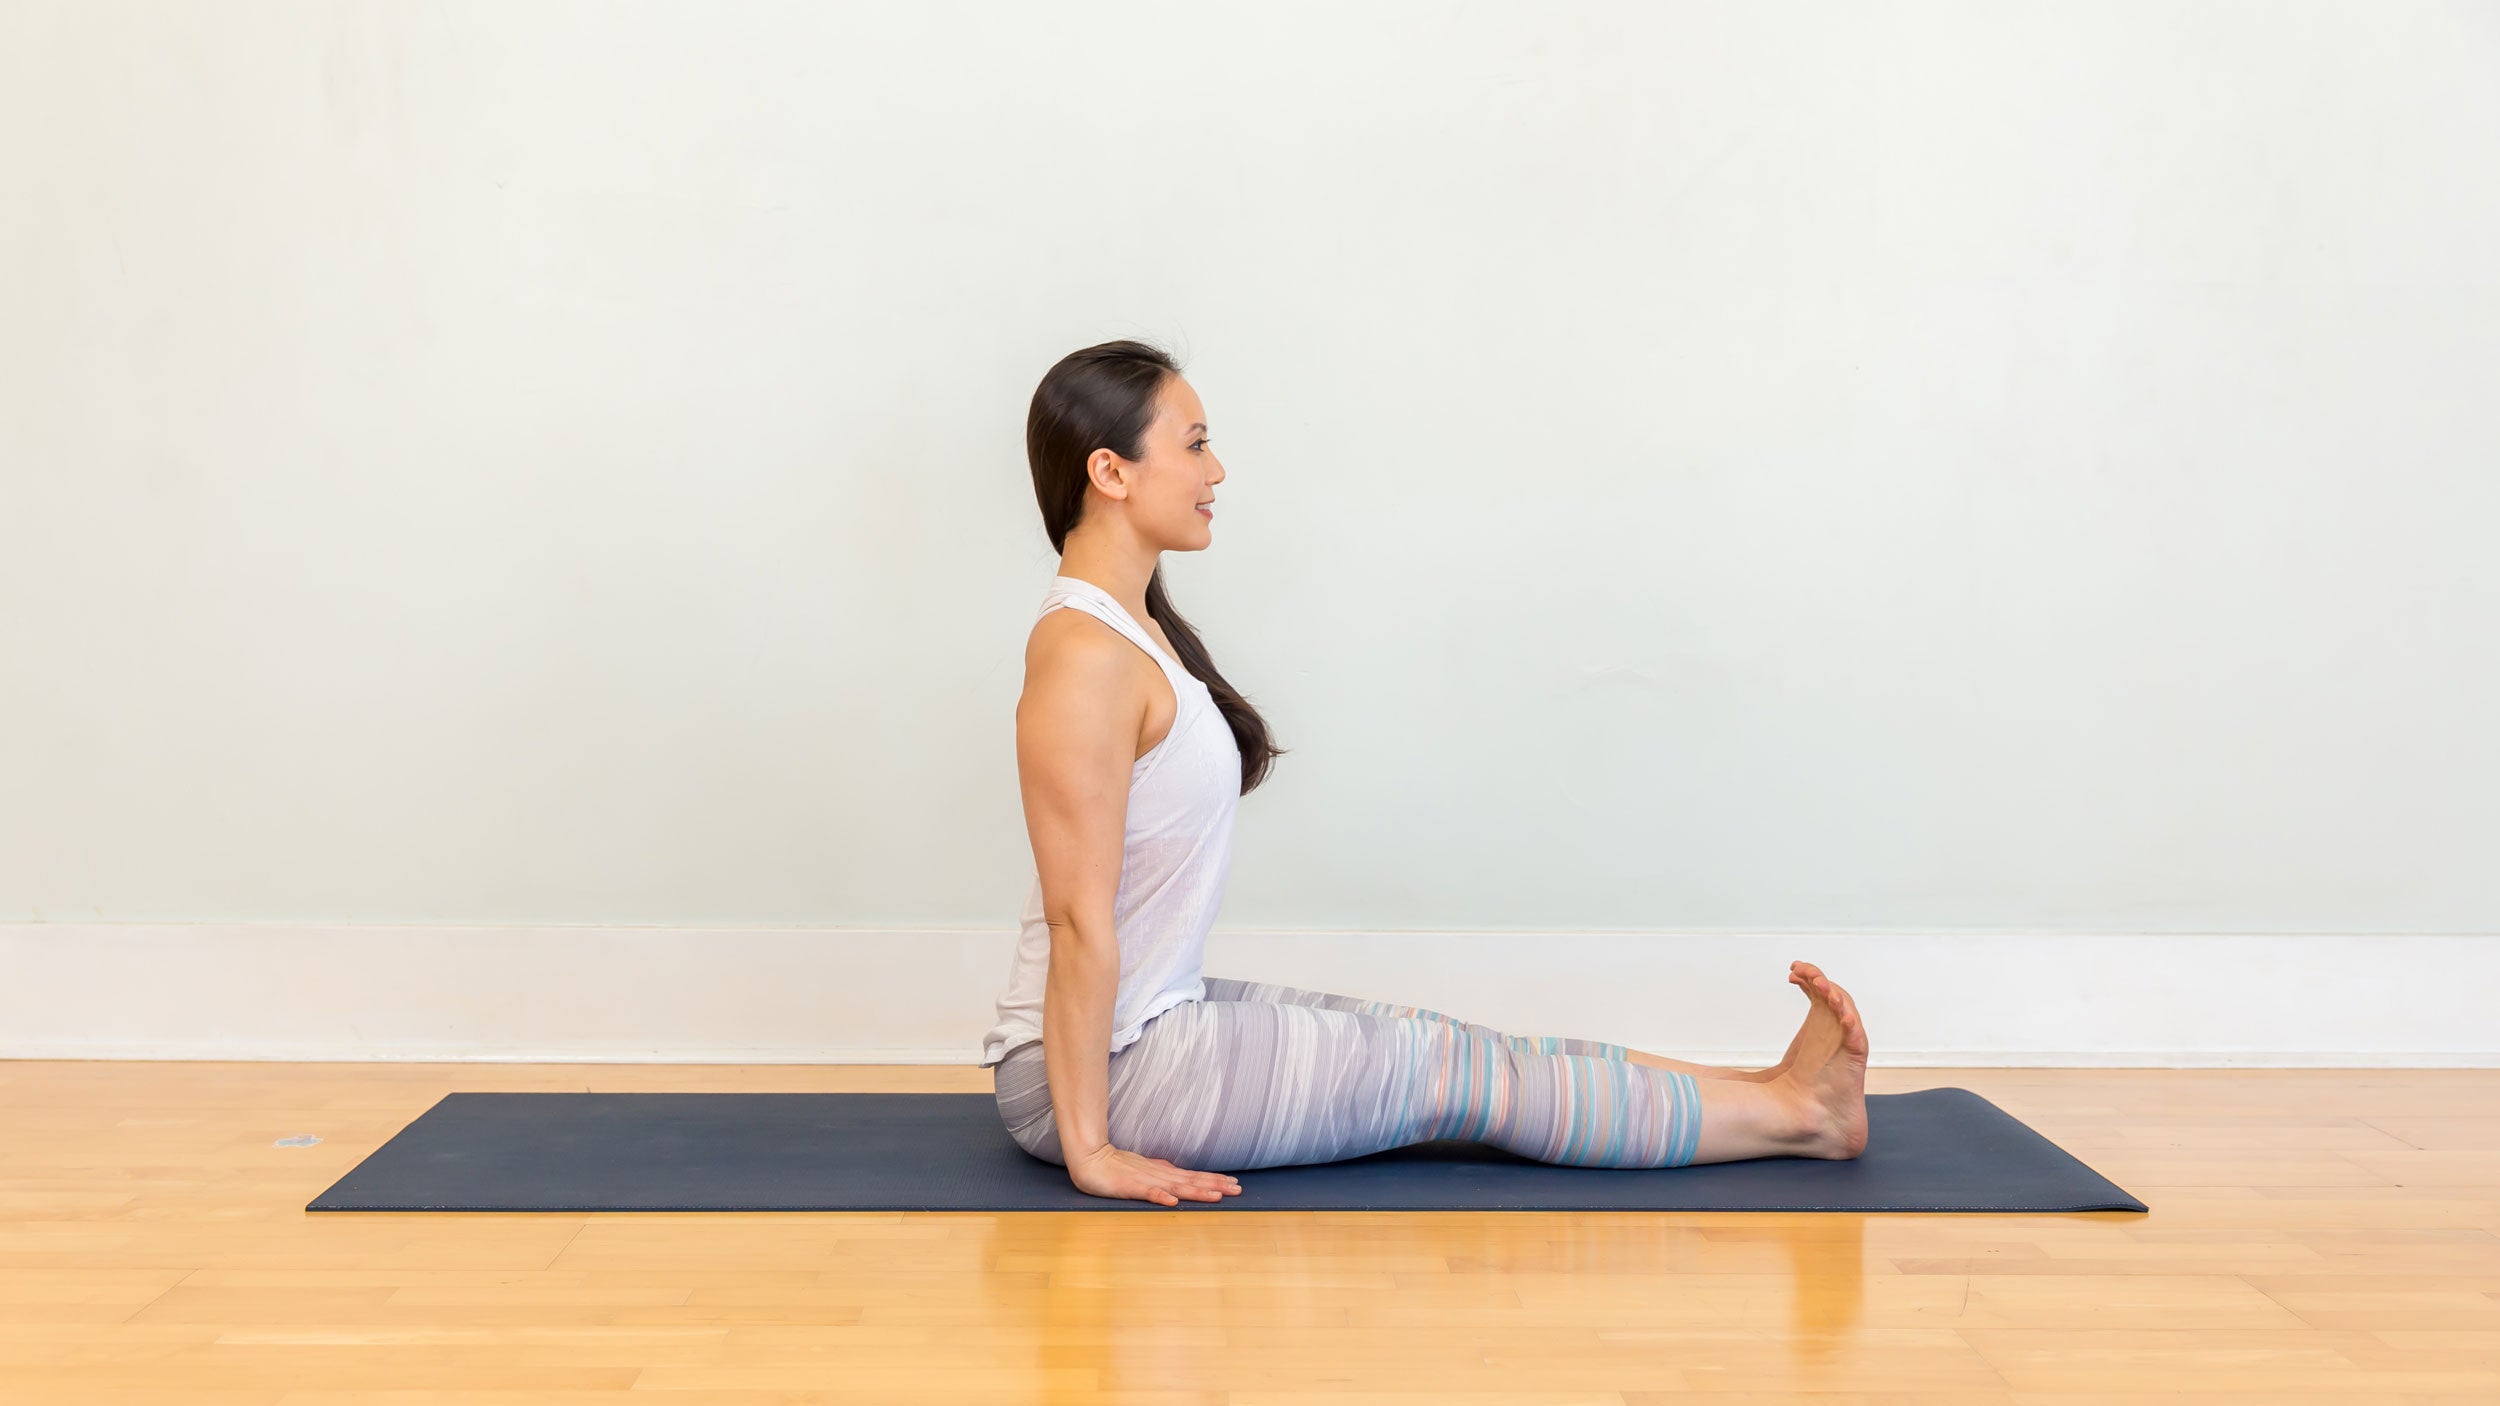
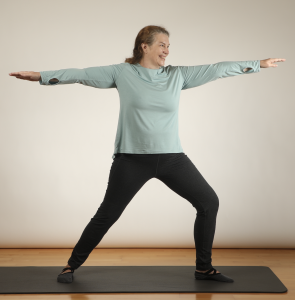
“Movement is the best medicine,” says Perrotto. “Where the work needs to be done is through exercises like mobility and motor training, because your brain and your muscles have to remember how to stay in that position. They need to be trained in that position.” He uses resistance training, motor control training, and yoga to maintain good posture.

“Reverse-posturing”

Reverse-posturing involves going into the opposite position that you spend the most time in. For example,  “standing up, bringing your arms overhead, opening up your chest, getting your shoulder blades moving, and getting your hips extending” if you’re sitting most of the day, says Perrotto. He adds that walking is a great counterbalance to sitting.

Set an alarm

You can set an alarm, Perrotto suggests, but he cautions that the success of this depends on how well trained you are. “If you’re disciplined, you can set an alarm for every 20 minutes to bring yourself to a correct posture.” Eventually, the goal is to recognize how long you can hold a good posture.

The takeaway

Back posture correctors are a good start to improving your posture. But I learned that they’re not a permanent fix. When I took mine off, my brain and body lost the feedback it was getting.

Posture correctors “start to speak to your body and brain (about) what a good position is,” Perrotto says. But “a posture position that may be good for you may not be good for another person.”

Also, a back posture corrector won’t be able to teach your nervous system and your brain how to support itself, which is the long-term goal, he says.

All of our experts recommend speaking with a physical therapist or doctor before trying a back posture corrector as a fix to a medical problem.

Next, learn how going braless can affect your balance and posture.

Women In Wellness: Dr. Ingrid Yang on the Five Lifestyle Tweaks That Will Help Support People’s Journey Towards Better Wellbeing


Article originally published via Medium – view here.

Travel- if there is one thing that makes us feel more alive and at the edge of our comfort zone, it is travel. It can be travel to connect with nature, see old friends, meet new friends, try new foods, experience foreign cultures. That is why I lead yoga retreats in a different place every year — so that people can come and have new experiences with me, step out of their comfort zone, but all with the grounding of yoga and breathwork.

Asa part of my series about the women in wellness, I had the pleasure of interviewing Dr. Ingrid Yang.

Dr. Ingrid Yang is a physician, certified yoga therapist, Reiki master and an advisory board member at wellness company obVus Solutions, where she contributed her expertise to the breathing exercises featured in the new minder® posture corrector + breathing coach app. When not practicing medicine, Dr. Yang leads yoga trainings and retreats all over the world, with a special focus on kinesthetic physiology and healing through posture modification, breathwork, meditation and mind-body connection. Dr. Yang has authored two books: Hatha Yoga Asanas and her latest release, Adaptive Yoga, published in November 2020.

Thank you so much for doing this with us! Our readers would love to “get to know you” better. Can you share your “backstory” with us?

Iam a physician, former attorney, yoga teacher, Reiki master, author of two books including my latest, Adaptive Yoga, and medical advisory board member at wellness company, obVus Solutions. Having had many different careers, I feel I am truly living my purpose as a physician, advising and educating people on their health. I started practicing yoga because I needed it on a very personal level. But my story is far from straight and narrow, and I’ve often had to ask myself really hard questions at times when the “right” answer seemed impossible to find.

In college, I was a type-A go-getter in New York City, full of ambition and energy. Yet the stress and pressure I put on myself felt suffocating. I was anxious and rigid, both physically and spiritually. Luckily, a friend recommended yoga to help ease my emotional inflexibility. Yoga taught me was that I could just breathe in each moment; I did not have to prove or accomplish anything. I could just breathe and exist. I had never felt so relieved. It was the best gift I could have ever received.

During law school at Duke I taught a lot of yoga, both to relieve stress and hone my skills. I took hours to prepare for each class scouring through yoga books, drafting outlines, and practicing in front of the mirror until I had the plans memorized. Yet it didn’t feel like work because I loved it so much. It was a process, but the hard work paid off as my weekly classes grew from 10 to 60 people within a year, and close to 100 by the end of law school. It was rewarding to have so many students benefit from a practice that I held so close to my heart.

After graduating, I moved to NYC to practice law but quickly realized that a corporate life would not fulfill my desire to make an impact in others’ lives. When my closest aunt passed away that year, I saw that our time on Earth is too short to live a life unfulfilled. So, I packed up my things and moved down to North Carolina to open a yoga center. It was scary. I was leaving a promising career as a corporate attorney at a large, reputable law firm to follow this “pipe dream” to found and run a yoga center. Without question it would not be the most lucrative path, but I decided to take the leap, based on gut instinct alone. Little did I know that, despite all the fears that I had and all the uncertainty ahead of me, this decision would put me on the path towards realizing the life I was born to live. So, I opened up Blue Point Yoga Center and, using money I saved from practicing law, built it from the ground up — no walls, no floors, just a vision. I am proud to say that Blue Point still stands today, a thriving multi-location yoga center in Durham, NC. And while there were hiccups along the way, the right opportunities and people — investors, contractors, teachers — always presented themselves at just the right moments. And I witnessed that — the minute that I would start to stress about something — the solution would come naturally and elegantly. It just goes to show that when you are on the right path, the entire universe aligns to clear the passage for you.

While running the center, I began to realize how connected yoga is to physics, kinesiology and human physiology. The way that we practice pranayama speaks fluently with our respiratory mechanics, and the transitions between postures logically connect to the biochemistry of our brains. As a child I had always wanted to be a doctor; however, I never believed I was smart enough. During my tenure at Blue Point I became more interested in medicine and devoured books and videos on our physiological inner workings. I started to teach through that lens, and because my yoga center was near to the Duke Medical Center, many of the doctors and nurses that attended my classes encouraged me to consider a career in medicine. Although I initially shrugged it off, I began by dipping my toes into pre-med classes at a local college and, after multiple applications, was finally accepted at medical school. Though medical training was grueling and exhausting, yoga provided much needed balance and kept me grounded.

Can you share the most interesting story that happened to you since you started your career? What were the main lessons or takeaways from that story?

I think the most interesting thing about my career is that, while it may appear to be a success, it was also riddled with failure. At times, it felt like every turn in the road brought about obstacles to challenge me, leading me to tough questions: How much did I want this? How dedicated was I?

It took me three tries to get into medical school. Then, I failed the first step to my medical certification boards (by one point). My med school threatened to hold me back a year, but I powered through, retook the test, and achieved a great score. Then, halfway through residency, I realized I had chosen the wrong specialty, and switched to Internal Medicine, where I had thrived previously. There was a lot of crying and feelings of disappointment and inadequacy. But I was so sure in my heart this was the right path.

After each hurdle, I continued to forge ahead, despite feelings of self-doubt. I felt like I had no other choice — this was my destiny. But today I am in the specialty that is perfect for me (I work as a hospitalist), with a medical group I love, in La Jolla, a city that I hope to always call home. Each failure taught me an important lesson: failing does not mean you are a failure. What defines us are the actions we take after the failure. Do you reflect and learn from the failure, get back up, and keep moving? Or do you take on the victim role and give up? There is always a choice. And I can guarantee you that the most successful people you know and admire have failed over and over again until they succeeded. Failing is all part of the process, and we must choose to take it in stride.

Can you share a story about the biggest mistake you made when you were first starting? Can you tell us what lesson you learned from that?

My biggest mistake was believing that if I just muscled through something that it would turn out the way I had envisioned. When you are a student, if you study harder, put in longer hours, then you can achieve the outcome you want. I was used to that because I had spent so much time in school. But the most important lesson I learned from that is to follow your instincts and pay attention to what the signs are telling you. Did a challenge arise to signal you to take a different direction to get to the same place? Or to ask you to turn around altogether? Often, the key is to sit still in order to know your heart’s greatest hopes and receive the answers. Remaining rigid would have caused me to stay in a medical specialty that was not the right fit for me. Instead, taking a step back in order to think about my values and goals led me to the right decision.

None of us are able to achieve success without some help along the way. Is there a particular person who you are grateful towards who helped get you to where you are? Can you share a story about that?

I am going to name someone I’ve never met: Michael Alan Singer. He is the author of The Untethered Soul, a book that unquestionably changed my life. The book allowed me to be courageous enough to ask myself difficult questions during what felt like impossibly challenging times. It allowed me to examine the limitations that I placed on myself and decide whether I would move past them or remain imprisoned by them. It taught me to be bold and brave about sharing my vulnerabilities and connecting in a real way with myself, with others, and with nature.

Ok perfect. Now let’s jump to our main focus. When it comes to health and wellness, how is the work you are doing helping to make a bigger impact in the world?

I consider myself first an educator, then a physician. My job is to educate patients so that they can make informed decisions based on their personal value systems. I am a huge fan of knowledge acquisition because knowledge is power. And if I can empower others by sharing knowledge, I feel that I have done my job. But in all, my patients teach me so much more than I can ever teach them. I have sat aside dozens of people on their death beds and they never say: “Gee, I wish I’d been in the office more instead of seeing my kids,” or “I wish I’d bought that expensive purse.” They say, “I wish I had reconciled with my estranged son,” or “I wish I had apologized to my wife for making her feel unseen during our marriage” or “I wish I had traveled to my parent’s homeland before it was too late.” These are the lessons I have learned from them. What is life really about? Where do we, as humans, find meaning In our connections?

Can you share your top five “lifestyle tweaks” that you believe will help support people’s journey towards better wellbeing? Please give an example or story for each.

  1. Travel- if there is one thing that makes us feel more alive and at the edge of our comfort zone, it is travel. It can be travel to connect with nature, see old friends, meet new friends, try new foods, experience foreign cultures. That is why I lead yoga retreats in a different place every year — so that people can come and have new experiences with me, step out of their comfort zone, but all with the grounding of yoga and breathwork.
  2. Stay curious — having a curious outlook will help your mind stay young and resilient. Asking questions of yourself, your spouse, your parents, strangers — staying curious about the world around you will allow you to experience the world in a manner which feels fresh and new every day.
  3. Move and exercise! — it is the number one (and only proven) way to delay Alzheimer’s dementia, improve your cardiovascular health, decrease your risk of cancer, and improve your overall quality of life.
  4. Use technology to your benefit, not your detriment. Tech tools like the minder® app (to which I contributed my expertise) can help track wellness goals and prompt healthy habits including good posture and proper breathing (essential for lung health, so important during a pandemic). But know when to turn off technology. Use it to benefit health, but put it away when done for the day.
  5. Sleep! — the brain needs time to rejuvenate, so be sure to make sleep a priority. Try to go to sleep and wake up at the same time every day, even on weekends. Try to get at least a solid 8 hours every night. It’s the #1 guaranteed way to make you more efficient, productive, and stress-free.

If you could start a movement that would bring the most amount of wellness to the most amount of people, what would that be?

We are in the midst of an unprecedented global pandemic. Now more than ever, we need to look to natural, proven methods to build our lungs, relieve stress, and improve emotional health. As a medical doctor and yoga teacher, I understand the benefits of how both good posture and proper breathing can not only build our lungs, but also alleviate stress, increase self-esteem, and improve positive mood. My advice is to take big deep breaths regularly (that alone improves your posture and brings oxygen to your muscles, which helps you feel invigorated). Technology can be our biggest ally here: studies show that people who wear wearables such as minder are more likely to take steps towards achieving their health and wellness goals by adding encouragement and motivation.

What are your “5 Things I Wish Someone Told Me Before I Started” and why?

  1. Haters gonna hate. But seriously — there will ALWAYS be nay-sayers. They may feel threatened by you, jealous, or maybe something about you triggers them. Whatever it is, it is not about you. Keep doing what you’re doing and don’t pay any mind to those that have nothing nice to say.
  2. Know your values. Be very clear about your values and you can then more easily make important decisions when you are coming from a place where you can remember your purpose and values.
  3. Maintain healthy boundaries. It is impossible for you to be everything to everyone all the time. In order to do well at what you are focused on in the present moment, you must be able to take a step back and not be pulled in every direction. That links back to remembering your values and staying on the path that helps you maintain these values.
  4. Surround yourself with those that support you and believe in you. Because in the moments where you doubt yourself (and there will be plenty of those moments), those people will sense that and share their belief in you, and by proxy, allow us to believe in ourselves again.
  5. Do only what you love! There are so many things in the world that you CAN do, but what MUST you do? I have been asked how I’ve been able to accomplish “so much”; it does not feel like that much to me, but the only reason I have accomplished anything is because I have only done what I love doing in the moment. In this moment, it is practicing medicine and spreading the good word of mindfulness and breathwork. And when you are doing what you love, it truly does not feel like work at all.

Sustainability, veganism, mental health and environmental changes are big topics at the moment. Which one of these causes is dearest to you, and why?

Mental Health. We are the masters of our own destiny. If you suffer from anxiety, there is a way out that is not just about pills. You can use breathwork, mindfulness techniques, connection to others. And none of those things have side effects!


San Diego Union Tribune Features Dr. Yang and Adaptive Yoga

This article was originally published in the San Diego Union Tribune on January 5, 2021


‘Adaptive Yoga’ tailors poses for those with 9 conditions, including Parkinson’s, arthritis, stroke and multiple sclerosis

A long and varied path led Ingrid Yang to her multifaceted career. An internal medical physician with the Sharp Rees-Stealy Medical Group, Yang, 41, also has been a yoga teacher for 22 years. Because her residencies included physical therapy and rehabilitation, it was a natural progression to develop yoga poses specifically designed for people with disabilities.

Yang collaborated with physical therapist Kyle Fahey to write the book, “Adaptive Yoga: Designed for a variety of bodies and conditions,” published in November.

“Yoga is intrinsically modifiable,” Yang said. “There’s a huge variety: hardcore hot yoga, laughing yoga, restorative yoga. And yoga offers so many ways to modify, including blocks, bolsters and walls.

“People with chronic medical conditions have an increased risk of depression and anxiety. Yoga is good at decreasing anxiety attacks and depressive responses. Yoga is a tool that’s not pharmaceutical. Using breath is important. When we deepen our breath, we can release frustration and let go.”

The book offers yoga adaptations for nine disabilities: low back pain; osteoarthritis of the hip and knee; rheumatoid arthritis; lower limb amputation; spinal cord injury; Parkinson’s disease; stroke; multiple sclerosis; and cerebral palsy.

These disabilities are fairly common, and Yang has worked closely with patients who have them. Many gave her feedback as she and Fahey were formulating the adaptations.

“Adaptive Yoga” was written for physical therapists and yoga teachers, and for people who have one or more of those conditions. It offers clear instructions and explanations in straightforward language, and each pose is accompanied by an illustrative photo.

But you won’t see supermodels demonstrating Warrior II or downward-facing dog.

“When we think about yoga, we envision the perfect gymnast doing unbelievable positions. And we think: ‘I can’t do that!’ ” said Yang, who tends to acutely ill patients at Sharp Memorial Hospital in Kearny Mesa.

“Every single one of the models in the book has the corresponding disability. That was important to me. What’s the point in me showing an amputee how to do a pose? Working with the models and with my students taught me how to actually write this book.”

‘An incredible feeling’

Nikki Armstrong was one of the first participants in sessions led by Yang and Fahey as they developed an adaptive yoga program at the Shirley Ryan AbilityLab in Chicago.

Armstrong, who had practiced yoga since high school, attended a cousin’s wedding in October 2018. A day or two later, the then-24-year-old woke up with what she described as “zombie arms.”

Within a few days, she was unable to walk or swallow.

Armstrong was eventually diagnosed with Guillain-Barré Syndrome (GBS), a rare autoimmune disease in which the body’s immune system attacks the nerves. It can result in complete paralysis.

She began to recover through a blood exchange procedure, but the impact of her paralysis was severe. She soon began physical therapy in Chicago, even while on a ventilator.

“That’s how I met Ingrid Yang,” said Armstrong, whose voice wavered from emotion as she recounted her story. “I remember going to class in my wheelchair. I was so touched by the fact that I could still do movement, I could do yoga, even with these limitations. It was an incredible feeling.”

Now 26, Armstrong works full time and can walk, run, and practice yoga like she did before contracting GBS. Besides numbness in her feet and occasional balance issues, she feels back to her former self.

“Ingrid has medical knowledge and incredible expertise in all things yoga, Armstrong said. “I’ve never been in a class so alive — everyone was excited about the possibilities of adaptive yoga. It’s not very well known and I’m glad the book will spread the word.”

‘Truly accessible for all’

Publishing “Adaptive Yoga” now was not ideal. Yang said the initial plan was for her to do book signings and demonstrations at yoga studios across the country.

She immediately put those plans on hold because of the pandemic. She’s trying to promote the book, available on Amazon, through social media and other safe methods.

“I think this book is important,” Yang said. “I didn’t want to write something no one would read. But I want to act in a manner that is responsible. The consequences of actions that would have seemed so benign are so serious now.”

In 2017, Yang transferred from Chicago’s Northwestern University to do her residency in internal medicine at Scripps Green Hospital. Since 2018 she has combined taking care of patients at Sharp Memorial with writing the book. Until the pandemic hit, she was also presenting yoga demonstrations worldwide.

Soon she will be offering livestream adaptive-yoga training seminars, including one on Jan. 16 for yoga teachers and medical professionals.

People who fall outside of those realms may benefit from reading “Adaptive Yoga.” Yang encourages seeking out a teacher or guide to help.

“If you may not be ready to do that, I’d recommend reading the chapter for your specific condition in its entirety. Then, determine by your own good judgment what poses and sequences resonate with you,” she said.

“There may be certain postures that you have been doing naturally without knowing they are yoga. Better yet, there may be poses that you aspire to that you can discuss with your physical therapist or yoga teacher.

“The book was written in plain terms to make it truly accessible for all. No yoga background is necessary, just a curious mind and a belief in yourself.”

Dr. Ingrid Yang’s thoughts on breathing

  • “Dozens of breathing techniques are available. Practice what feels comfortable for you. Some techniques utilize slow, diaphragmatic breathing, and others use a more rapid, energetic breath.”
  • “There is no one-size-fits-all. Once you have practiced a breathing technique and mastered it, you can start to explore others recommended in ‘Adaptive Yoga.’ ”
  • “Be mindful of your breath.”
  • “This mindfulness of the breath in each posture is the essence of yoga and a breathing technique itself.”

Adaptive yoga training

A livestream training for yoga teachers and medical professionals

Instructors: Ingrid Yang, author of “Adaptive Yoga,” and Jennifer Chang, founder of The Movement Mechanic
When: Jan. 16, 8 a.m. to 5 p.m.
Cost: $425
For more information: ingridyang.com/retreats-trainings/adaptive-yoga-training

Wood is a freelance writer.

What inspires you to write?


The answer is different for everyone. For me, my inspiration comes from reading the works of great authors. Inspiring authors. Those that have lived through adversity so they could retell their stories of triumph and share the lessons they learned. Authors with different interests., and writers with completely different lives.


So when I read, I am inspired to write. And when I write, I seek to connect. I do not purport that I have anything particularly sanguine to share in my writing, simply my experiences and desire to connect. It is how we have been connecting since we learned how to carve images onto walls of caves. Something left there for future generations to read and understand their roots.


And now I have co-authored this book, my second, entitled Adaptive Yoga. It is a book that I hope opens doors for many people, students and teachers alike. It is a book that I hope sets a new direction for yoga and its therapeutic benefits. It is a book that, I hope, makes a difference in someone’s life, the way that many of the books I’ve read have inspired me. (If you haven’t read “Better” by Atul Gawande, it was one of my inspirations for going to med school!).


The book is releasing this week, and despite the book being written, I continue to write. I am writing articles for magazines about the book and blog posts about my experiences. I am writing outlines for podcasts so I can spread the good word of Adaptive Yoga. I do so with both a love for writing and a fear of judgment. It is hard to write about yourself and your experiences. It is difficult to explain to others what is from your heart.


I am not sure what I will write next, but I hope I continue to be inspired to write. And with that, I will continue to read the works of others in hopes I can be heard and connected the way I feel I hear and connect with the authors I love. When inspiration comes from others, their legacy lives on in me, and in those that read what I have written. Thank you for reading with me, and for helping me write by inspiring me. I hope you write something today too, and dedicate it to the authors who inspire you. Love, Ingrid