6 Yoga Poses For Knee and Hip Arthritis – Dr. Yang’s Feature in Yoga Journal

Original article was featured in Yoga Journal – view article here.

Arthritis is the most common condition affecting the musculoskeletal system, with the kneeand the hip being the two most commonly affected joints. Approximately 21 percent of adults in the United States live with arthritis, which is characterized by the slow and sometimes progressive loss of cartilage that covers the bones of a joint.

Many people assume medication or joint surgery are the only ways to curb arthritis pain, but increasing evidence shows that targeted exercise and strength training can actually delay or, in certain circumstances, even prevent the need for surgery.

Both the Centers for Disease Control and Prevention (CDC) and the Arthritis Foundation recommend exercise programs for hip and knee arthritis that include flexibility, strengthening, endurance, and balance. Yoga has all four components, making it a perfect tool for reducing arthritis pain and disability.

How Yoga Reduces Arthritis Pain

Practicing yoga strengthens the muscles around an effected joint, stabilizing it and reducing pain. People with hip and knee pain should focus on strengthening a few critical muscle groups: the knee flexors (hamstrings), knee extensors (quadriceps), hip extensors (glutes), and hip abductors (outer thighs).

Another reason strengthening these muscles is important: Say you have arthritis in your knee. The pain will likely cause you to put less weight on the joint and use it less. Over time, that lack of causes weakness in the surrounding muscles, which causes more pain. What’s more, when you use these muscles less, their range of motion is decreased…which causes more pain, which feeds right back into the cycle.

The solution: Adding these six poses—which strengthen the muscles around the hip and knee—to your practice.

Side Plank on Forearm (Vasisthasana)

Hip abductor weakness is common in hip and knee arthritis. When the hip abductors are weak, you might shift your weight over the hip where you feel pain when you walk. That causes the pelvis to tilt downward instead of upward, which increases compressive forces on the inner knee joint. Side Plank is one of the best exercises to strengthen the gluteus medius muscle, which is the primary hip abductor.

side plank on forearm
Photo: Colin Gazley/Human Kinetics

Come into a Forearm Plank.  Rotate the right forearm so the fingers of the right hand point toward the left hand and your right forearm is at a 45-degree angle to the front edge of the mat. Roll to the outer edge of your right foot, stacking your left foot over the right. Press the hips up and away from the mat, engaging the core and right inner thigh up into the left leg. Lift the left fingertips to the sky and press the right forearm down into the mat as you stack the shoulders. Gaze forward or up to the left hand. Hold for 3 to 5 breath cycles. Repeat on the other side. If this pose is too hard on your shoulders, lower the bottom knee to the mat for more support.

Warrior I (Virabhadrasana I)

In Warrior I, the quadriceps muscles are strengthened by maintaining knee stability as the hip, knee, and ankle of the front leg flex. Warrior I also strengthens the hip extensors of the back leg by controlling the degree of hip extension and abduction because of its role in centering the pelvis over the feet. Warrior I also offers variability because you can control the length of the stance (keep feet closer together for more stability). If this pose hurts your knee, shorten your stance and back off of the deep knee bend of the front leg.

warrior I
Photo: Colin Gazley/Human Kinetics

Starting in Downward-Facing Dog Pose, step the left foot forward between the hands so that it is placed next to the left thumb. Spin the right heel down approximately to a 45-degree angle and spin the outer edge of the right foot down so the entire plantar aspect of the foot grounds down. With your left leg bent and thigh parallel to the floor, inhale your arms up to the sky, hands facing each other, fingers pointing up. The back leg remains straight and strong as you anchor the foot to square the hips forward. Lift the lower abdomen up and in as you lengthen the tailbone down. Draw the shoulders down the back, and gaze forward or slightly up between your hands. Hold for 5 breath cycles. To exit, bring the hands down in a swan dive to frame the foot, and return to Downward-Facing Dog. Repeat on the right side.

Extended Side Angle Pose (Utthita Parsvakonasana)

Hamstring strengthening is an important principle in improving muscle strength and decreasing pain in people with hip arthritis. Extended Side Angle places the front hip into abduction and external rotation, allowing for increased activation of the hamstrings. This change in the center of gravity, when compared to Warrior I, minimizes the activation of the hip adductor muscles and offers more potential for strength gains in the posterior leg muscles. Isometrically pull the front knee toward the trunk to activate the hamstrings.

extended side angle pose
Photo: Colin Gazley/Human Kinetics

Start in Warrior II Pose, with the left foot forward. Place the left forearm onto the left thigh, or the left hand to the floor or on a block outside your foot. Extend the right arm over the right ear to feel the extension in your right side body. The palm faces down to the ground with the fingers extending out in front of you. Extend both sides of the waist to reach out and over the front thigh. Engage the abdomen to protect the spine and side. Your gaze can extend toward your right hand, to the ground, or straight forward, depending on which is most comfortable for your neck. Hold for 5 breath cycles. To exit the pose, turn the torso to the mat to frame the left foot with your hands, and step back to Downward-Facing Dog Posebefore switching sides.

Bridge Pose (Setu Bandha Sarvangasana)

Bridge is an excellent way to strengthen the hip extensors in a moderate weight-bearing position without overextending the joint. Bridge also strengthens the knee flexors and core and stretches the hip flexor. Hip strength is important in individuals with knee arthritis, because it decreases the workload on the quadriceps and places less force on the knee.

bridge pose
Photo: Colin Gazley/Human Kinetics

Start by lying on your back with your knees bent, feet flat on the floor, and arms alongside your body with hands facing down. Roll your shoulders underneath you as you begin to lift your hips. Press your feet and shoulders into the mat as you lift your hips. As you rise, walk the feet closer to your buttocks and scoot your shoulders into midline to further elevate the hips and lengthen the tailbone. Keep your knees parallel as you engage the inner thighs. Interlace the fingers on the mat, extend the palms on the floor next to you or hold on to a strap with the hands. Keep your neck neutral by relaxing your chin away from your chest to preserve the natural curve of your cervical spine. Your shoulders, feet, and back of the head support your lift comfortably on the mat because you are using the muscles of your buttocks and back to lengthen your hips. Hold for 5 to 10 breath cycles. To exit the pose, release the hands if interlaced and slowly roll down your spine.

Gate Pose (Parighasana)

Gate activates the hip adductors in the kneeling leg, which keeps the hip in an internally rotated position. To engage the hip adductors, isometrically contract the kneeling leg toward the midline. This pose also strengthens of the hip abductors of the kneeling leg and the knee extensors of the extended leg.

gate pose
Photo: Colin Gazley/Human Kinetics

Start in a standing kneel (on your knees and shins, but hips lifted). You can place a folded blanket under the knees for cushioning and comfort. Step your right leg out to the side to straighten the knee, with the right toes pointed forward. Make sure your hips are aligned over the knees. Inhale the arms up to the sky and relax your right hand to draw down your right leg toward the ankle, stretching through the left side of the trunk. Continue pressing the hips forward, so as not to let the buttocks bow out. Feel the stretch on the right inner thigh as you ground through the right foot. Bend farther into the side bend, as much as is comfortable but at the same time challenging. Hold for 5 to 10 breath cycles. To exit the pose, reach both arms back up to the sky and step the right knee next to the left. Switch sides.

Tree Pose (Vrksasana)

Tree pose helps with knee extension mobility, knee extensor strengthening, hip abductor strengthening, and increased core stability. Tree requires significant muscle activation of the knee extensors and knee flexors to keep the knee of the standing leg in neutral extension. It also  activates the hip abductors to keep the pelvis level. The lifted leg strengthens the hip flexors and hip external rotators of the bent leg to maintain the same-side hip in line with the pelvis. With the knee flexors bending the knee, it also provides excellent hip opening because it stretches the internal rotators. Hip muscle weakness is quite common in people with hip arthritis, so modifications will likely need to be made initially. Be mindful in Tree: It can place compressive loads on the standing knee while the knee extensors in the straightened knee are strongly contracted.

tree pose
Photo: Colin Gazley/Human Kinetics

Start in Mountain Pose (Tadasana), with a firm footing on the ground and your gaze focused on an object in front of you. Shift all of your weight to your left leg and bend your right knee up into your chest, catching hold of the knee with your hands. Hold your right ankle with your right hand and fold the foot into your inner thigh. Press the left thigh back into your right foot so the foot does not overpower the standing leg or cause it to bow out. Reach your arms overhead or keep the hands to prayer at heart center. Lengthen through your tailbone and engage the abdomen as you draw the shoulder blades down the back and open the heart space. Hold for 5 to 10 breath cycles. To exit the pose, step your right foot down and shake it out. Repeat on the opposite side.

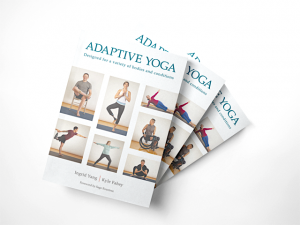
Adapted from Adaptive Yoga by Ingrid Yang and Kyle Fahey. Reprinted by permission of Human Kinetics. Copyright © 2021. Buy now

Ingrid Yang, MD, JD, E-RYT 500, C-IAYT, is a yoga therapist, teacher, and physician. She leads teacher trainings, workshops, and retreats all over the world, seeking to integrate her background in allopathic medicine with the ancient teachings of the centuries-old yoga traditions. Her teaching is seeded deeply in dharmic philosophies and an expert grasp of movement kinesiology.

Kyle Fahey, DPT, PT, is a doctor of physical therapy and senior physical therapist at the Shirley Ryan AbilityLab in Chicago, Illinois, the world’s largest and top-ranked acute rehabilitation hospital. He is the founder and creator of a weekly wheelchair yoga program for the hospital and seamlessly integrates adaptive yoga into his treatments.

Read Dr. Yang’s Feature in The Healthy – I Tried a Back Posture Corrector—Here’s What Happened

This article was originally posted by The Healthy.

I used a back posture corrector for two weeks to improve my posture and alleviate my back pain while sitting. This is what it was like.

Sit straight, shoulders back

Growing up, my mom would tell me to stand tall, sit up straight, shoulders back, chest out, and face forward. After all, this is the key to maintaining good posture and looking confident. And this was before you could wear a discreet back posture corrector. Today, I still heed that advice, but working remotely full-time has led me to slouch more. (Sorry, mom.)

At the beginning of the Covid-19 lockdown, I would find myself hunched over with my back slightly rounded. When I noticed, I would correct myself. But, of course, shortly after I’d reassume the hunched position. As lockdown restrictions were extended, I started to do more sitting than standing (no commute wait times or crowded subways to add to my “stand” goal). Soon, the aggravating lower back pain started to kick in. (Here’s how to improve posture for back pain relief.)

If you use a computer for work, chances are you’re guilty of “sinking into” your work activity and starting to slouch like me.

A small study, published in 2013 in the Journal of Back and Musculoskeletal Rehabilitation, found musculoskeletal pain is common among laptop users. Shoulder pain was the most common (75.7 percent) and elbow pain the least common (37.3 percent). Those who reported the most musculoskeletal pain also used single-strap laptop bags.

The shift from being out and about on a day-to-day basis to leading a sedentary life (minus the at-home workouts and short 10-minute walks) took a toll on my back. Desperate for a quick fix, I decided to do what any millennial would do: I browsed Amazon for a good product. Enter the back posture corrector.

What is a back posture corrector?

A back posture corrector is a wearable device that typically comes in the form of a cross-back brace with adjustable straps, a long line back brace, a lower back belt, or an electronic option with built-in sensors that aim to provide better spinal alignment.

“It can help alleviate muscle tension by reducing pressure on the spine, thereby reducing the amount of strength needed in the muscles to support the spinal column,” says Ingrid Yang, MD, an internal medicine physician in San Diego.

“Back posture correctors sometimes use straps in order to create a force to pull you into what the [manufacturer] perceives as the ‘correct’ posture,” says David Perrotto, a physical therapist at Prehab Network in New York City. They act as constant feedback for how it feels to be in a proper posture position. However, Perrotto cautions, the alignment that the posture correctors bring you into may or may not agree with your body.

He urges you to seek a physical evaluation from a physical therapist first before you buy.

Choosing a back posture corrector

Due to overwhelming curiosity and an Amazon Prime Day deal, I decided to act with haste and get a back posture corrector without consulting a medical professional. (Don’t try this at home.) I opted for a Gearari posture corrector on Amazon that has more than 21,000 reviews and is Amazon’s “#1 Best Seller.”

The major selling point: It was on sale for $7.20 (original price $21.99). Not only was it a good deal, I saw it as  an important investment for my health.

Before I started, I read there’s an adjustment period called the “14 Days of Evolution,” according to the manufacturer, during which your posture is expected to improve. For two weeks, you’re supposed to wear it for two hours every day—you can’t wear it for too long in the beginning.

Perrotto agrees you should introduce the back posture corrector gradually. This is so you don’t “introduce too much of a different stimulus to your body, as it can lead to extreme soreness or pain,” he says.

In other words: Your body needs to adjust to it.

His recommendation is to start 30 minutes three times a day on an eight-hour workday. “As long as you do not experience any adverse effects, gradually start to increase the time it’s being used,” Perrotto suggests.

After my back posture corrector arrived, I tried it out for the recommended two weeks. This is what happened.

What it’s like to use a back posture corrector

Week one

The first day using my posture corrector, I was eager and ready to improve my spinal alignment. This back posture corrector was confusing to put on at first. I had to adjust the straps for a few minutes to get it to a setting that was comfortable for me. It almost seemed as if it was my first day of school with a JanSport backpack. The adjustable straps on the back brace are designed so that if you slouch, you’ll feel some tension on your shoulders because the straps tighten.

Ready to start my workday, I made sure my feet were flat on the floor, my chair and computer screen height adjusted, and my hands and arms positioned correctly on the armchair and keyboard.

I was mindful of my posture and ready to reap some benefits. Instead of using it for two hours consecutively, I divided it up into four 30-minute intervals over an eight-hour workday to gradually get my body accustomed to it. (Here are some desk ergonomics to learn.)

After a full workday and taking it off after use, I did notice my concentration and my posture seemed better while wearing the corrector. I was, however, relieved whenever I took it off because it felt like I was wearing a backpack. I felt the straps underneath my armpits.

During the week, I wore the back posture corrector every day and felt different when I wore it versus when I didn’t. I felt I could breathe better. The rest of my body also felt “linear” and alert.

Week two

One week later and I felt the same. I felt great when I wore the posture corrector because I was mindful of my sitting position during the day. I was able to focus more, breathe better, and I also felt my digestion improved after I came back from eating lunch or having a snack. (Here’s what you need to know about sitting disease.)

A plus: My neck and lower back didn’t hurt as much as before. This is likely due to not putting much strain on those muscles. I was relieved for the relief.

However, once I took it off, I slowly started to morph into my standard and “comfortable” slouch position. I would start to notice after working on a story and immediately sit up straight again. But, without the posture corrector, I eventually slumped back down. (Here’s how bad posture can affect your health.)

The truth is the back posture corrector alone is not enough. It’s a temporary solution to a bigger issue. Disappointed, but not surprised, I realized the back posture corrector only works when I wear it. Science agrees.

What the science says

In a small study of 38 healthy overhead athletes (for instance, baseball, volleyball, and tennis players) prone to poor posture, researchers found the use of a compressed shirt and shoulder brace during upper body exercises led to an improvement in shoulder posture and muscle activity. The study was published in the Journal of Athletic Training.

It seems a posture corrector brace does provide the benefit of self-awareness when you wear one, making you more likely to maintain good posture.

The type of back posture corrector experts recommend

When it comes to using back posture correctors, experts vary on what they do and do not recommend.

Preston Brown, a Milwaukee-based board-certified clinical specialist in geriatric physical therapy and owner of Prestige Therapy and Wellness, says you should consider body height and body weight when shopping for a posture corrector. “This is to ensure proper fit and support.”

He adds that it’s important to look for comfort because some posture correctors are a challenge to put on and take off, not to mention uncomfortable to wear. A healthy price range to look for is between $10 to $50, according to Brown. (These are the best posture correctors back experts recommend.)

Meanwhile, Perrotto does not advise the use of these devices. “I don’t use back posture correctors,” he says. “In my clinic, I train people to teach their body to find the position on their own. People need to work on their body and not rely on an outside source. Only if they are forced to sit down for a while will I use something to give them feedback on when they fall into poor posture.”

Dr. Yang agrees, saying she doesn’t believe in back brace use except in an acute situation under the instruction of a doctor. And even then, she says, “I do not recommend the use of back braces for longer than a few days. They are only meant to be helpful in reminding us to maintain good posture.”

If you experience increased pain or discomfort, skin irritation/breakdown, onset of numbness or tingling, or no improvement in posture, Brown advises to stop using immediately.

Ways to improve your posture

If you do not want to opt for a back posture corrector, there’s good news: You can work on improving your posture naturally.

Strength and conditioning exercises

“Conditioning yourself and gradually strengthening the areas that are weak, imbalanced, or overworked with spine-strengthening exercises, is the better way to go,” says Dr. Yang. She suggests doing these exercises when you take your regular breaks throughout the day to stretch and strengthen. “This will help counteract the effects of sitting at a computer for hours at a time,” she says.

Brown also agrees that stretching your lower and upper back along with gentle stretches will promote good posture and help decrease stress or strain on the entire spine. “Make sure that the exercises you want to do are correct for you and that you are doing them correctly by consulting a physical therapist.” (This is the best time to work out.)

Resistance training

“Movement is the best medicine,” says Perrotto. “Where the work needs to be done is through exercises like mobility and motor training, because your brain and your muscles have to remember how to stay in that position. They need to be trained in that position.” He uses resistance training, motor control training, and yoga to maintain good posture.

“Reverse-posturing”

Reverse-posturing involves going into the opposite position that you spend the most time in. For example,  “standing up, bringing your arms overhead, opening up your chest, getting your shoulder blades moving, and getting your hips extending” if you’re sitting most of the day, says Perrotto. He adds that walking is a great counterbalance to sitting.

Set an alarm

You can set an alarm, Perrotto suggests, but he cautions that the success of this depends on how well trained you are. “If you’re disciplined, you can set an alarm for every 20 minutes to bring yourself to a correct posture.” Eventually, the goal is to recognize how long you can hold a good posture.

The takeaway

Back posture correctors are a good start to improving your posture. But I learned that they’re not a permanent fix. When I took mine off, my brain and body lost the feedback it was getting.

Posture correctors “start to speak to your body and brain (about) what a good position is,” Perrotto says. But “a posture position that may be good for you may not be good for another person.”

Also, a back posture corrector won’t be able to teach your nervous system and your brain how to support itself, which is the long-term goal, he says.

All of our experts recommend speaking with a physical therapist or doctor before trying a back posture corrector as a fix to a medical problem.

Next, learn how going braless can affect your balance and posture.

What inspires you to write?


The answer is different for everyone. For me, my inspiration comes from reading the works of great authors. Inspiring authors. Those that have lived through adversity so they could retell their stories of triumph and share the lessons they learned. Authors with different interests., and writers with completely different lives.


So when I read, I am inspired to write. And when I write, I seek to connect. I do not purport that I have anything particularly sanguine to share in my writing, simply my experiences and desire to connect. It is how we have been connecting since we learned how to carve images onto walls of caves. Something left there for future generations to read and understand their roots.


And now I have co-authored this book, my second, entitled Adaptive Yoga. It is a book that I hope opens doors for many people, students and teachers alike. It is a book that I hope sets a new direction for yoga and its therapeutic benefits. It is a book that, I hope, makes a difference in someone’s life, the way that many of the books I’ve read have inspired me. (If you haven’t read “Better” by Atul Gawande, it was one of my inspirations for going to med school!).


The book is releasing this week, and despite the book being written, I continue to write. I am writing articles for magazines about the book and blog posts about my experiences. I am writing outlines for podcasts so I can spread the good word of Adaptive Yoga. I do so with both a love for writing and a fear of judgment. It is hard to write about yourself and your experiences. It is difficult to explain to others what is from your heart.


I am not sure what I will write next, but I hope I continue to be inspired to write. And with that, I will continue to read the works of others in hopes I can be heard and connected the way I feel I hear and connect with the authors I love. When inspiration comes from others, their legacy lives on in me, and in those that read what I have written. Thank you for reading with me, and for helping me write by inspiring me. I hope you write something today too, and dedicate it to the authors who inspire you. Love, Ingrid