The 8 Best Yoga Poses for Tennis Players

The original article was posted on YogaJournal. See the article here.

With the arrival of spring and warmer weather, tennis fans are ready to hit the courts. During a recent trip to the Maldives, I took up tennis again after a 20-year hiatus and noticed sore muscles that I forgot existed! So, per usual, I turned to yoga to ease my aching muscles and to connect with my breath while playing this cardiovascularly intensive sport.

When designing a yoga program for a specific activity, whether tennis, cycling, or skiing, it’s helpful to begin with a review of the muscles we use while engaging in the sport. In this case, it is no over-exaggeration to say that tennis requires the use of all of our muscle groups. While it may appear that the upper body muscles are the primary movers in tennis, the lower body and core play an integral role as well. To understand how this dynamic works, we’ll have to visit our dear friend (or in my case, frenemy), physics.

Tennis is the transfer of energy

Effectively hitting a tennis ball requires the coordinated activation of a kinetic chain of motion. The kinetic chain refers to the linkage of multiple segments of the body, which allows for the transfer of forces, resulting in moving the tennis ball. When striking the ball, your core must engage as the feet push against the tennis court to propel your body forward, stabilizing the trunk and maintaining your center of gravity. The power then moves into your chest, back, and arms. In this elegant sequence of energy transfer, the power is conveyed from the legs and core into your arm and racket, then to the ball. So the racquet is simply the messenger transferring this power from your core to the ball.

This yoga sequence works to transfer vitality back to your muscles after a hard workout on the tennis court, and return the energy (virya) back into the ground.

8 yoga poses for tennis players

Prasarita Padahastasana (Reverse Hand-to-Foot Pose)

Why this yoga pose works for tennis players: This variation of Padahastasana focuses on stretching your inner wrists and forearms, not the backs of your legs. In practicing this pose with the hands reversed—meaning your palms are on the ground, facing your body—the stretch is focused on your wrist flexors, which are integral in gripping the tennis racket. This stretch can also help to prevent muscular imbalance in the forearms, which will protect your wrist extensors, decreasing your risk for tennis elbow.

How to: From standing, fold forward over your legs. Bend your knees deeply so you can place your hands on the floor. Rotate your forearms so your fingers point toward your feet with your palms on the ground. Root the heels of your hands into the earth and feel a stretch in the inner forearms. Optionally, step on the back of your hands/fingers to intensify the stretch as shown in the photo. Hold for 3–5 breaths.

Adho Mukha Svanasana (Downward-Facing Dog Pose)

Why this yoga pose works for tennis players: This pose stretches the posterior legs, especially the calf muscles, which provide the power to push off from the court as you move toward the ball. It also stretches and lengthens your back muscles, which often become tight from quick bursts of running.

How to: From Prasaraita Padahastasana, step off your feet, turn your hands around so your fingers face forward. Step back and lift your hips into an inverted V-shape with your body. Straighten your elbows and drop your chest back toward your shins. Bend your knees slightly to take any strain off the backs of your knees. Pedal through your feet. This will enhance the stretch in the calf muscle opposite of the bent knee. Hold for 5–10 breaths.

Virabhadrasana I variation (Warrior I with chest stretch variation)

Why this yoga pose works for tennis players: Chest and hip stretching are particularly important in tennis because your body sits in flexion as you wait for the ball to zoom across the net at you; your knees and hips bend, and shoulders hunch forward over your racket. This tension often tightens your chest muscles, which may increase your risk for shoulder injury. This Warrior I variation stretches the hip flexors in your back leg and your chest all at once.

How to: From Down Dog, step your right foot forward, bending the front knee to 90 degrees. Rotate your left foot slightly so that your outer heel is grounded. Raise your torso, and instead of extending your arms to the sky, interlace your fingers behind the back of your head and open your elbows wide. Allow your hands to create a hammock to hold the weight of your skull. Feel the fronts of your shoulders and chest open, and shine your heart to the sky. Take 5 deep breaths, stretching your intercostal (rib) muscles while maintaining your Warrior I legs. Transition to the other side through Down Dog and hold for another 5 breaths.

Gomukhasana variation (Cow-Face arms in wide-legged stance)

Why this yoga pose works for tennis players: Shoulder stretches are helpful in tennis because they soothe the arm and upper back muscles, which are used every time you swing the tennis racquet. These stretches can also maintain your shoulder’s ability to internally rotate, preventing shoulder impingement injuries that can arise from the repetitive arm motions tennis requires.

How to: From your Warrior I variation, release your hands onto your hips and turn your body and feet toward the long edge of the mat. Keep your legs in a wide stance for a strong base of support, and reach your right hand to the sky and left hand down alongside the hip facing forward. Bend both elbows, reaching the right hand down and left hand up, trying to connect the fingers. If you are unable to touch the hands together, use your tennis racket (or a towel) to create an extension of the hands to find the shoulder stretch. Hold for 5 breaths and switch sides.

Bonus: You can also fold forward and relax your torso between your legs to add an additional stretch to the back of your legs.

Anjaneyasana variation (Crescent Lunge variation with quad stretch)

Why this yoga pose works for tennis players: The quadriceps extend the knee, which is important for running powerfully in tennis. However, tight quadriceps can create muscular imbalances and leave the hamstrings vulnerable to injury, which is common in tennis. Quadriceps flexibility can help prevent knee pain, and reduce risk of knee and hamstrings injuries.

How to: Make your way into Down Dog, and then step your right foot between your hands, as you lower your left knee to the mat. (Double up your mat or tuck a blanket under your knee to pad your knee cap). Stack your hands on your right knee to lift your torso upright. Keep your right hand on your front leg for balance and bend your left knee to actively bring your foot toward your buttocks. Catch hold of your left ankle with your left hand. If there is strain to grasp your ankle, wrap a strap (or a towel) around your left foot and gently pull it toward your buttocks with your left hand to find the stretch. Hold here for 3–5 breaths and switch sides, transitioning through Down Dog.

Supta Eka Pada Rajakapotasana variation (Supine Pigeon)

Why this yoga pose works for tennis players: Your lower body function is contingent on the foundation of the hips. Your hips support the spine, keep your body upright, and provide a base of support for your torso. When it comes to athletic challenges on the court, the hips are one of the most important parts of your body. Maintaining hip flexibility with stretching is an important way to sustain your tennis game long-term. This pose stretches the muscles in the outer hips which decreases tension/strain in the joints of the legs and lower back.

How to: Lower your knees from Down Dog and roll onto your back. Bend your knees and place your feet flat on the ground, hip-width apart. Bring your right knee into your chest, and externally rotate your hip joint so your right ankle rests above your left knee. Lift your left foot off the ground and draw both legs into your chest, interlacing your fingers behind your left thigh or shin. Relax your lower back on the ground (don’t let it lift off the mat), and optionally press your right knee away with your right hand to intensify the stretch. Hold for 5 breaths and switch sides.

Supine Twist

Why this yoga pose works for tennis players: Tennis requires a great deal of strength-based twisting in your torso. These movements can create tension throughout the torso, shoulders, and neck, and thus cause tightness in your postural back muscles. Twisting in an off-loaded position (without downward force on the spinal column) can help to release tension and relax these hard-working back muscles.

How to: Lying on your back with your knees bent and feet flat on the mat, extend your arms out to the side in a T-shape. Cross your right knee over your left and walk your buttocks to the right a few inches so your spine remains in alignment during your twist. Roll your knees towards the left and turn your head to the right. Relax here for 5–10 breaths and then switch sides for another 5–10 breaths.

Upper back mobilizer with a ball

Why this works for tennis players: Tennis or no tennis, this is an awesome recovery technique for anyone (especially with all the shoulder and neck strain we have due to sitting in front of computers and devices). And good news! If you play tennis, you’ll have a tennis ball handy. This self-massage technique is a great way to work knots out of your shoulders and neck, and is oh-so-satisfying.

How to: With a tennis ball in one hand, lie on your back or stand with your back against a wall. Position the ball above your shoulder blade, close to your neck. Move your body side-to-side, up-and-down to access your upper trapezius muscles. After a few roll-overs, let the ball rest there for a little while, taking some slow breaths, until you feel your muscles soften. You are in control regarding how deep you want the ball to unlock your muscles and can adjust by how much body weight you put on the ball. It’s best to be gentle as you start out.

One final recommendation

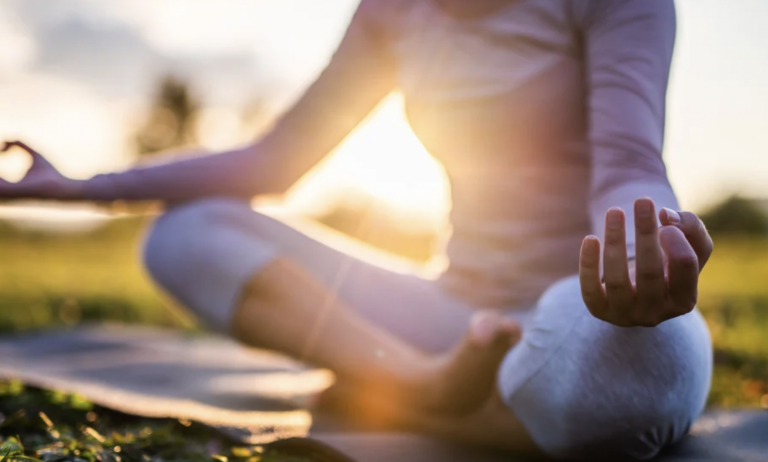
Tennis is a cardiovascularly demanding sport that requires a great deal of mental focus, so be sure to include some pranayama and meditation in your practice. In addition to improving your focus, pranayama can help improve lung capacity and strengthen your diaphragm. So, don’t skip out on doing some deep breathing and meditation to help your tennis game.

Newsweek: Yoga Exercises for COVID Recovery, According to Experts

This original article was featured in Newsweek. Read the original article here.

Has a COVID-19 infection impacted your breathing? If you’re looking to get back into exercising after COVID, yoga can be a key way to rebuild your breathing abilities, which is crucial for physical activity.

In yoga, each breath is connected to a specific action or movement. “This is the foundational principle of yoga as an exercise modality and philosophy,” Dr. Ingrid Yang, a physician and Experienced Registered Yoga Teacher (E-RYT)-500 who is also certified by the International Association of Yoga Therapists (IAYT), told Newsweek. “Yoga is the only form of exercise we know that, in order to perform properly, necessitates linking breath with movement.”

COVID affects everyone differently, with some coming out of it relatively “unscathed” and able to jump right back into their normal fitness routine. Others may deal with residual effects for an extended period of time, also known as long COVID, Kelly Clifton Turner, an E-RYT-500 and the director of education for YogaSix, told Newsweek.

Even after your doctor approves you for a return to exercise, it’s important to assess how you are feeling before beginning your normal workouts, the yoga instructor advised.

Here we look at some of the best yoga exercises for COVID recovery.

Yoga for COVID Patients

Clifton Turner suggests starting with simple movements that connect breath and movement.

These moves (such as the cat-cow, downward-facing dog, Chaturanga and half sun salutations recommended below by Clifton Turner) can be a good way to assess your strength, flexibility and stamina and “ultimately plan your broader return to yoga exercises, she said.

The COVID recovery yoga poses recommended by Yang below “stem from understanding what patients go through while they are actively infected,” the physician and yoga therapist explained.

Cat-Cow

According to Yang, many people recovering from COVID (along the entire spectrum of the disease from mild to severe) have not moved much during their active infection period and feel disconnected from their bodies.

The cat-cow invites movement and spatial awareness back to the body and also links this movement with breath, which is an essential component of COVID-19 recovery, she noted.

Clifton Turner said toggling back and forth for a few rounds of breath through the cat-cow moves can help awaken the spine and increase flexibility and mobility.

  • Get into a “tabletop position” on your hands and knees, with your shoulders positioned over wrists and hips over the knees.
  • Inhale and get into the cow position by “allowing your belly to hammock,” Clifton Turner said, and lifting your tailbone toward the sky. Tile your pelvis back, stretching your chest and face up to the sky, advised Yang.
  • Then exhale into the cat position by rounding your spine, tucking your chin toward your chest, hips towards your nose and your tailbone inward.

Yang advised going through the cat-cow movements with your breath for three to four cycles. You can also do the cat-cow moves sitting up in a chair by placing your hands on your knees and moving the spine through the cat-cow moves with your breath, she said.

Staff Pose

While this pose may initially seem like you’re simply just sitting on the ground, “it is actually quite difficult because you are actively sitting and using your postural muscles,” Yang said.

“Posture is integral for proper respiratory function and COVID-19 rehab is centered around encouraging patients to sit up tall and use their core and back muscles,” she explained.

  • Start by sitting on the floor with your legs straight out in front of you. If this bothers your back, sit on a rolled up blanket or yoga block, Yang suggested.
  • Put your palms next to your hips to help you sit upright, while engaging the belly and relaxing your shoulder blades down your back.
  • Point your toes toward the sky so you feel the fronts of your legs engage. Stay in this position for three breaths.

The cat-cow and staff poses “work seamlessly together because they allow us to start moving the body again safely,” Yang said.

Locust Pose

Even patients who are not severely ill from COVID may still experience a milder form of Acute Respiratory Distress Syndrome (ARDS) during the course of their illness, Yang said. “With patients suffering from ARDS, we recommend a manoeuvre called proning. Locust pose is essentially a form version of proning,” she explained.

  • Start by lying on your belly on the floor or a mat. Your arms should be stretched alongside your body, with your forehead to the floor or mat.
  • Inhale to engage your belly to lift your arms, shoulders, chest, and head off the ground. Exhale to relax your body down.
  • “Try not to hold your breath as you rise and descend and allow the length of your breaths to be your focus,” Yang noted.
  • Cycle through this movement five to eight times. To rest, stack your hands under your forehead and take a few deep, relaxing breaths, she said.

Downward-Facing Dog

  • From the tabletop position, walk your hands about one-palm’s print forward. Tuck your toes under and draw your hips up and back toward the sky, Clifton Turner said.
  • Pedal out your feet to slowly open up your hamstrings, allowing your head to hang heavy to decompress your neck.
  • Once you are feeling comfortable, “move to a place of stillness so you can focus on long, steady breaths,” she said.

Chaturanga Transition

  • The Chaturanga (or yoga push-up pose) is a great test of strength, Clifton Turner noted. From the downward dog position, inhale and shift forward to “a high plan/top of a push up” position. Release your knees to the ground for more support.
  • Then exhale and lower halfway down while hugging your elbows into the body. “Focus on keeping the body long and strong from the feet through the crown of the head or your knees and crown,” the yoga instructor explained.
  • Stop once your shoulders are in line with your elbows. Press either back to a plank pose or pass through to form the upward-facing dog position before returning to the downward-facing dog move, she said.

Half Sun Salutations

  • Stand tall with your feet hip-width apart, allowing your hands to fall by your sides.
  • Inhale and circle your arms up to the sky.
  • Exhale and hinge at your hips, maintaining a long spine, and swan dive forward. Release your fingertips towards the floor or your shins.
  • Inhale and reverse swan dive back up to stand up.
  • Exhale and draw your hands back to your heart. Repeat this for three to five rounds, Clifton Turner advised.

Want to Deepen Your Focus in Meditation? Try This Zen Practice

The original article was posted on Yoga Journal. See the full version here.

You know that feeling of losing yourself in something you enjoy? That’s joriki.

The ability to settle into a state of one-pointed focus is a key element in meditation. On paper, this may seem straightforward, but even long-time meditators—even on their best days—can find it difficult to find focus. Learning joriki may help you reignite your focus and bring energy back into your mindfulness practice.

In Zen meditation, joriki is a term used to describe deep focus. The “jo” is sometimes translated as samadhi, which we know from the Yoga Sutras as a state of being intensely present. “Ki” is spiritual energy, compassion, and wisdom. As a word taken together, joriki means “stable strength”—the power or ability to remain steadfast, balanced, and focused.

You have probably unknowingly experienced joriki before. It’s losing yourself in something you enjoy so much that an hour goes by without even realizing it. In meditation practice, it is that calming sense that you are “at one” with the moment and at peace with circumstances. Joriki enables you to sit, undisturbed, allowing your thoughts and sensations to arise, while your mind and body are unified in meditative concentration. For most, that powerful concentration is often fleeting. However,  you can harness joriki again with a simple and intentional breathing practice.

A meditation practice for joriki

Step-by-step instructions

  • Start by finding a comfortable seat. Bring your focus to the breath and begin counting each breath as it arises. This gives you a tangible focal point to return to when your mind drifts.
  • Breathe in for a count of 4 and then exhale to a count of 4. Increase or decrease the number based on your natural cadence. Your breath should be easy, not forced.
  • When your mind begins to wander, “touch” the thought with your awareness and let it go. Return to your breath as your anchor. If you find this difficult, then imagine you are on a raft floating down river. As a thought comes up, let it go as your raft gently glides forward.
  • Avoid the temptation to suppress your emotions. As they arise, notice them, touch them, and sit with them. You cannot fight the current, you must simply move with it.
  • As you bring your attention back to the breath each time, you will stop noticing your thoughts as distractions, and your awareness will remain focused on the present moment.
  • With time, you will strengthen this skill and develop the patience to navigate the currents of life. Each time you return to the breath, your awareness will build and you will access the spiritual power of joriki with more ease.
  • Coming together with joriki

    Eventually, you will follow the rhythm of your breath and let go of your counting, you will become one with your breath, and the experience will feel effortless. In this state of joriki, your body and mind meet in serene focus. Don’t rush the process. With experience, your awareness will sharpen and your internal dialogue will dissipate. In this state of powerful concentration, your meditative practice will blossom. As joriki grows stronger, you will move closer toward samadhi, the single-pointedness of your mind and the power of focusthat lies within you.

5 Yoga Poses to Ease Your Aching Neck

Technology can (quite literally) cause a pain in your neck. Luckily, your practice can help you find relief.

At least half of us will experience neck pain in our lifetimes, according to some estimates. But given our busy, technologically focused, modern lives (hello Zoom!), I’d say that has the potential to increase to 100 percent. Luckily, yoga for neck pain can help. Here, we look at why you may be having neck issues—and share five yoga poses that can help prevent and alleviate neck pain.

Read the full article on YogaJournal.com – https://www.yogajournal.com/poses/anatomy/neck/yoga-for-neck-pain/

8 Expert Tips to Make a Yoga Teacher Website That Shines

Marketing yourself can feel downright unyogic, but it is possible to do it authentically—starting with your website.

As a yoga teacher, you are brilliant at what you do. Now, you need to figure out how to market yourself. The first step: You need a website. Your studio and event partners expect it, your clients ask about it, and it legitimizes you as a professional. If you utilize it correctly, it can also help to grow your audience organically. Here are eight expert-backed tips for making your website stand out.

Read the full article on Yoga Journal!


Yoga Teachers: Here’s Exactly What You Should Charge For Classes

There’s no magic formula, but these tips and strategies will help you identify a price that you are comfortable charging.


Determining how much to charge for your classes and workshops is one of the first challenges every professional yoga teacher faces. As teachers, it is often hard to assign a monetary value to our teaching when yoga is closely coupled to our passion for a practice that has given us so much. It can be a delicate balance between sharing what you love while also being equitably compensated for your time and energy. After all, teaching yoga is an energy exchange, and energy flows best when there is balance. While there is no perfect formula to calculate your rate, here are some tips and strategies to help you identify a price that you are comfortable charging.

See also: 5 Reasons Why Even the Best Teachers Need Liability Insurance

1. Begin with your values

Start out by asking yourself some basic, yet important, questions; reflecting on your answers can be a great starting point.

  • What is your main motivation for teaching yoga? Is it simply to enjoy and share the practice with others, or is it also a means to support yourself and your family?
  • What are your expenses and will they be covered by the prices you set? It may not make sense to pay more for childcare or transportation than you earn for teaching a private session. So be sure to consider these costs when calculating your prices. Other expenses you may want to consider include taxes, managing your website, accounting and more.  Don’t forget to include travel time as part of your pricing calculation!
  • Do you want to work for someone else or for yourself? While there is much more freedom to set your own price levels when you work for yourself, it is important to determine if it is worth the time and cost of marketing, accounting, and more. On the other hand, working for someone else often involves accepting the compensation set by the employer, with very little negotiation room.

Read the rest of the article on Yoga Journal’s website!

Women to Watch: Ingrid Yang

This article was originally published on STRONG. Read the original version here.


Age: 41     Hometown: San Diego, CA     
Gig: Physician, Yoga Therapist & Meditation Teacher     Follow her: @ingridyangyogamd


For physician and author Ingrid, achieving optimal health for herself and her patients is not simply a matter of practicing “this” or “that.” Instead, she firmly believes that a broad approach to fitness is key to living your best life. She says, “I like to mix things up in my fitness routine. I practice yoga almost daily, but I also cycle, run, surf, hike, and swim in the ocean regularly.” Ingrid says she’s motivated by helping others understand why it’s beneficial to incorporate a variety of modalities into their fitness plans. “It’s important to keep your body challenged, your mind engaged, and prevent injury.”

Ingrid believes that exercise should also include meditative aspects such as breathing techniques, posture control, and meditation.

Ingrid knows first-hand how critical a mindful movement practice can be, especially when you’re not feeling 100%. “I recently fractured my ankle and it took months of rehab to get back to even walking,” she says. Throughout her rehab, Ingrid continued with yoga because it helped her regain balance and stamina, and with her book, Adaptive Yoga,Ingrid is helping individuals with disabilities learn to improve their wellness, too. “I practice yoga therapy in the hospital setting with my patients. Even if you are in the hospital bed, you can still practice plenty of yoga,” she says.


5 Reasons Why Even the Best Yoga Teachers Need Liability Insurance

The trade off in cost is definitely worth your peace of mind.

As yoga teachers, there’s one thing we don’t like to think about, and we certainly don’t like to talk about it: a student getting hurt in class. Just the thought of it probably makes you shudder in fear.

If a student becomes injured during one of your classes, you might feel guilt-ridden that it may have been your fault—or frustration because it definitely was not your fault. There’s also likely fear, because you could be legally or financially responsible. It somewhat follows the antithetical storyline of the best-told Greek tragedies; you don’t make much income teaching yoga, and now you may get sued for it?

Read the full article on Yoga Journal’s website! 

8 Ways to Build Your Client Base as a Teacher

You just finished your YTT. Here’s how to stand out from the crowd to build—and keep—a strong student following.


Building a solid client base is one of the prime goals for any yoga teacher. With good reason: There’s nothing more demoralizing than showing up week after week prepared to teach, only to look out into an empty class! But how do you build up a loyal student community that truly represents your vibe? While there is no easy answer or template, this expert advice will help you on the road to success.

Read the full article on Yoga Journal!